Knitted baby blanket

IMG_6537

It’s a simple idea:

Cast-on with 51 stitches and knit in garter stitch. Every right side row, reduce the centre 3sts down to 1 by slipping one stitch, knitting the next two together and then passing the slipped stitch over. After 12 rows in your main colour, change to a highlight. When you get down to 3 stitches, purl all 3 together on the next wrong side row and fasten off.

IMG_6534IMG_6541IMG_6542

Four matching small squares are sewn together to make a big square.

Then the big squares will be sewn together to make an even bigger square!

IMG_6549

(I’m mildly concerned that my seams are a fat on the reverse, but I guess all blankets made in patches are like this. And I’m sure it’ll condense a bit in the blocking anyway)

IMG_6546

I’ve used Drops yarn for this project. Their yarns are great quality, inexpensive, washable, and varied in both colour and fibre choices. The grey is their baby merino and the highlight colours are baby alpaca silk.

IMG_6553

I’m hoping to have it finished in the autumn so I’ve got a long way to go! Perfect vacation project though, I’m sure I can bash out a fair few before the summer’s over.

Free pattern – mini rib and cable sock

This is the baby-scale version of the men’s sock pattern which I put up here a few weeks back. I bought 2 skeins of the Uncommon Thread Tough Sock for the full size pattern and had enough left over to knit these little guys plus a baby hat to match! I’ve only gotten one sock finished, but I’ve weighed the rest of the yarn and I’ll be fine. In fact I’ve got so much left that I think I should’ve made the socks a little longer in the leg.

IMG_5955

IMG_5967

The hat pattern is from Debbie Bliss’ book Ultimate Baby knits, which I’ve used extensively. I would thoroughly recommend it to anyone, but especially those in their late 20’s with a lot of heterosexual female friends – trust me, they’ll drop like flies and every pattern in here is an absolute gem. Buy yourself a job lot of baby cashmerino in grey and prepare for the onslaught.

IMG_5970

IMG_5973

These socks are carbon copies of the grown up ones, but at approximately half the scale. The proportion of the heel turn and gusset have been tweaked a little for a chubby baby foot, and the lengths of leg and foot are much smaller than 50%, but the look is an adorable mini-me of the original.

IMG_5957


Mini Mens Rib and Cable Sock:

Abbreviations:

sl:            slip

psso:      pass the slipped stitch over

ssk:         slip one stitch, slip the next stitch, the two slipped stitches together

k2tog:    knit two together


Left sock:

Cuff:

Cast on 42sts using the long tail method. 2.5mm needles.

Knit in 1×1 rib for 10 rows.


Leg:

Round 1: K5, p1, (k3, p1) x9.

r2:            (K2tog and k into 1st st again before slipping both off needle) x2, k1, p1, (k3, p1) to end.

r3:            as round 1

r4:            K1, (k2tog and k into 1st st again before slipping both off needle) x2, p1, (k3, p1) to end.

Rounds 1-4 form the stitch repeat for the travelling stitch detail.

Repeat rounds 1-4 twice more.


Heel flap:

K5, p1, k1, (sl 1 st with yarn in back, k1) x10, k1, turn.

Sl 1st st, p20, turn.

These 21 stitches form heel flap.

Right side row: (sl 1 st with yarn in back, k1) to last st, k1.

Wrong side row: sl 1 st, p to end.

Repeat these two rows until heel flap measures 6.5cm.


Turning the heel:

Row 1:     Knit 13sts, ssk, k1, turn.

r2:            Slip 1, p6, p2tog, p1, turn.

r3:            Slip 1, knit to one stitch before gap (the slipped stitch from previous row), ssk to close gap, k1, turn.

r4:            Slip 1, purl to one stitch before gap (the slipped stitch from previous row), p2tog to close gap, p1 turn.

Repeat rows 3 and 4 until all sts have been worked. (13sts)


Gusset:

Knit 13sts of heel, pick up and knit 11sts along the left side of heel flap, k21sts of instep (keeping rib and travelling stitch pattern repeat), pick up and knit 11sts along left side of heel flap (56sts)

Place the marker here for the start of the round.

Round 1: K22, k2tog, k1, (p1, k3) x3, p1, (K2tog and k into 1st st again before slipping both off needle) x2, k1, p1, k1, sl1 k1 psso, k9

r2:            k24, (p1, k3) x3, p1, k5, p1, k11

r3:            k21, k2tog, k1, (p1, k3) x3, p1, K1, (k2tog and k into 1st st again before slipping both off needle) x2, p1, k1, sl1 k1 psso, k8

r4:             k23, (p1, k3) x3, p1, k5, p1, k10

r5:            K20, k2tog, k1, (p1, k3) x3, p1, (K2tog and k into 1st st again before slipping both off needle) x2, k1, p1, k1, sl1 k1 psso, k7

r6:            k22, (p1, k3) x3, p1, k5 p1, k9

Continue decreasing in this way, decreasing 1 stitch at each side of the gusset on every other row, until 42 stitches remain.


Foot:

Continue working these 42 stitches, keeping rib and travelling stitch pattern correct, until the measurement from the back of the heel is 8cm (or 2.5cm less than the length of the foot of the intended wearer).


Toe shaping:

Using 2 stitch markers split the sock into two halves, 21sts between markers.

r1:            knit along sole to 2sts from marker, k2tog, (pass marker), sl1 k1 psso, knit along instep to 2sts from marker, k2tog, (pass marker), sl1 k1 psso, k to end of round.

r2:            knit all sts

These 2 rounds form decreasing pattern, repeat until 15sts remain between markers, 30sts total. Ending on round 1.

Next round, as round 1.

Repeat round 1, decreasing every round, until there are only 7sts between markers, 14sts total.


Graft toes closed using Kitchener stitch.


Right sock:

Cast on and knit cuff as left sock


Leg:

Round 1: (k3, p1) x9, K5, p1

r2:            (k3, p1) to last 6sts, (k2tog and k into 1st st again before slipping both off needle) x2, k1, p1.

r3:            as round 1

r4:            (k3, p1) to last 6 sts, k1, (k2tog and k into 1st st again before slipping both off needle) x2, p1.

Rounds 1-4 form the stitch repeat for the travelling stitch detail.

Repeat rounds 1-4 twice more.


Heel flap:

(K3, p1) x3, k1, (sl 1 st with yarn in back, k1) x10, k1, turn.

Sl 1st st, p20, turn.

These 21 stitches form heel flap.

Right side row: (sl 1 st with yarn in back, k1) to last st, k1.

Wrong side row: sl 1 st, p to end.

Repeat these two rows until heel flap measures 6.5cm.


Turning the heel:

Row 1:    Knit 13sts, ssk, k1, turn.

r2:           Slip 1, p6, p2tog, p1, turn.

r3:           Slip 1, knit to one stitch before gap (the slipped stitch from previous row), ssk to close gap, k1, turn.

r4:           Slip 1, purl to one stitch before gap (the slipped stitch from previous row), p2tog to close gap, p1 turn.

Repeat rows 3 and 4 until all sts have been worked. (13sts)


Gusset:

Knit 13sts of heel, pick up and knit 11sts along the left side of heel flap, k21sts of instep (keeping rib and travelling stitch pattern repeat), pick up and knit 11sts along left side of heel flap (56sts)

Place the marker here for the start of the round.

Round 1: k22, k2tog, k1, p1, k5, (p1, k3) x3, p1, k1, sl1 k1 psso, k9

r2:            k24, p1, k1, (k2tog and k into 1st st again before slipping both off needle) x2, (p1, k3) x3, p1, k11

r3:            k21, k2tog, k1, p1, k5, (p1, k3) x3, p1, k1, sl1 k1 psso, k8

r4:            k23, p1, (k2tog and k into 1st st again before slipping both off needle) x2, k1, (p1, k3) x3, p1, k10

r5:            k20, k2tog, k1, p1, k5, (p1, k3) x3, p1, k1, sl1 k1 psso, k7

r6:            k22, p1, k1, (k2tog and k into 1st st again before slipping both off needle) x2, (p1, k3) x3, p1, k9

Continue decreasing in this way, decreasing 1 stitch at each side of the gusset on every other round, until 42 stitches remain.


Foot:

Continue working these 42 stitches, keeping rib and travelling stitch pattern correct, until the measurement from the back of the heel is 8cm (or 2.5cm less than the length of the foot of the intended wearer).


Toe shaping:

Using 2 stitch markers split the sock into two halves, 21sts between markers.

r1:            knit along sole to 2sts from marker, k2tog, (pass marker), sl1 k1 psso, knit along instep to 2sts from marker, k2tog, (pass marker), sl1 k1 psso, k to end of round.

r2:            knit all sts

These 2 rounds form decreasing pattern, repeat until 15sts remain between markers, 30sts total. Ending on round 1.

Next round, as round 1.

Repeat round 1, decreasing every round, until there are only 7sts between markers, 14sts total.


Graft toes closed using Kitchener stitch.

Free knitting pattern – men’s rib and cable sock

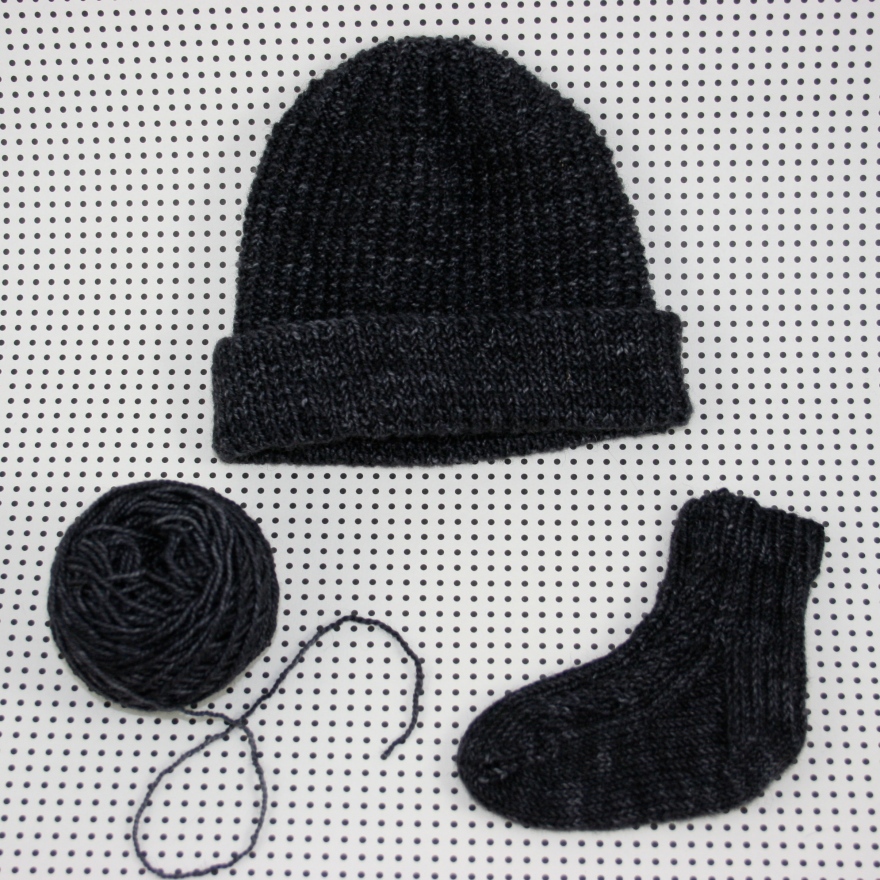
I wrote this pattern and subsequently knitted these socks for my girlfriend Lucy’s dad, Paul. His 60th birthday was last September and finally I have gotten around to pulling the pattern together and putting it up here! But I’m actually pretty gutted that I didn’t sort this out before I gave them away, because now I’m left with photos I don’t really like but can’t retake. So please forgive the images in this one and try to trust me – these are actually nice.

IMG_7738.jpg

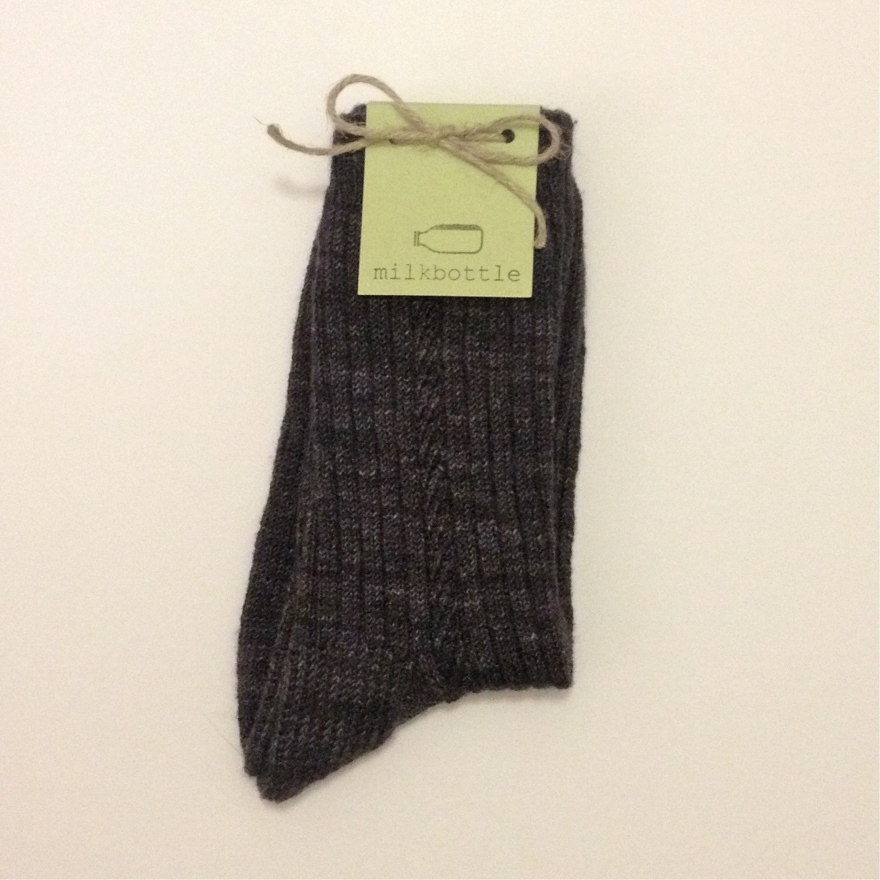
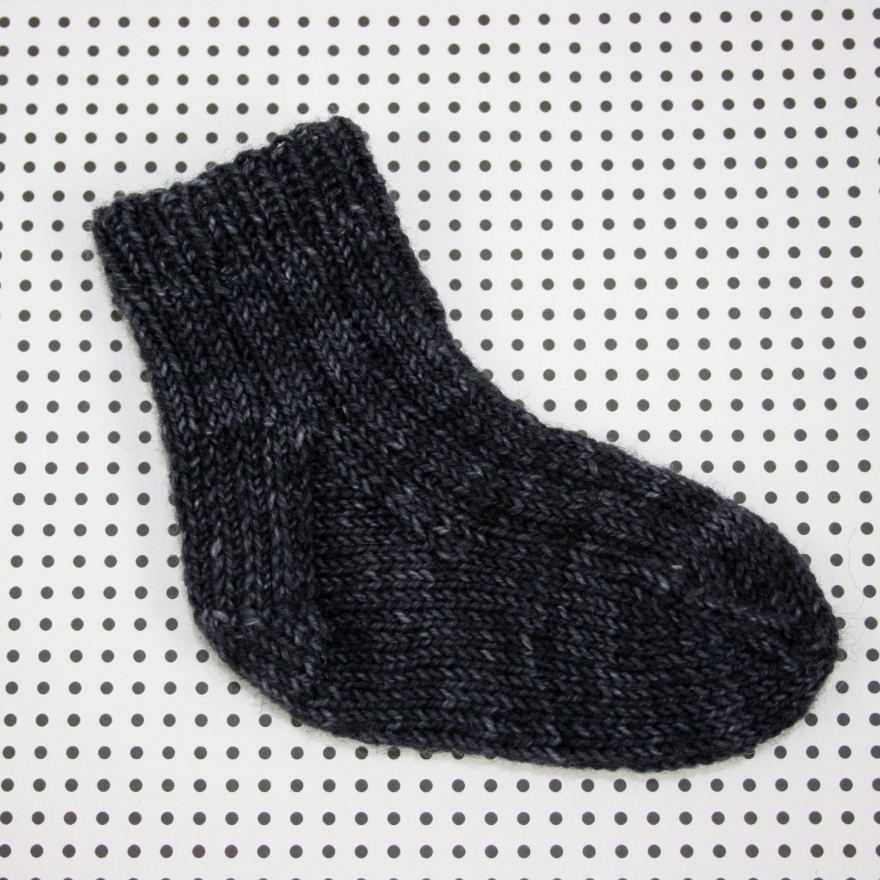
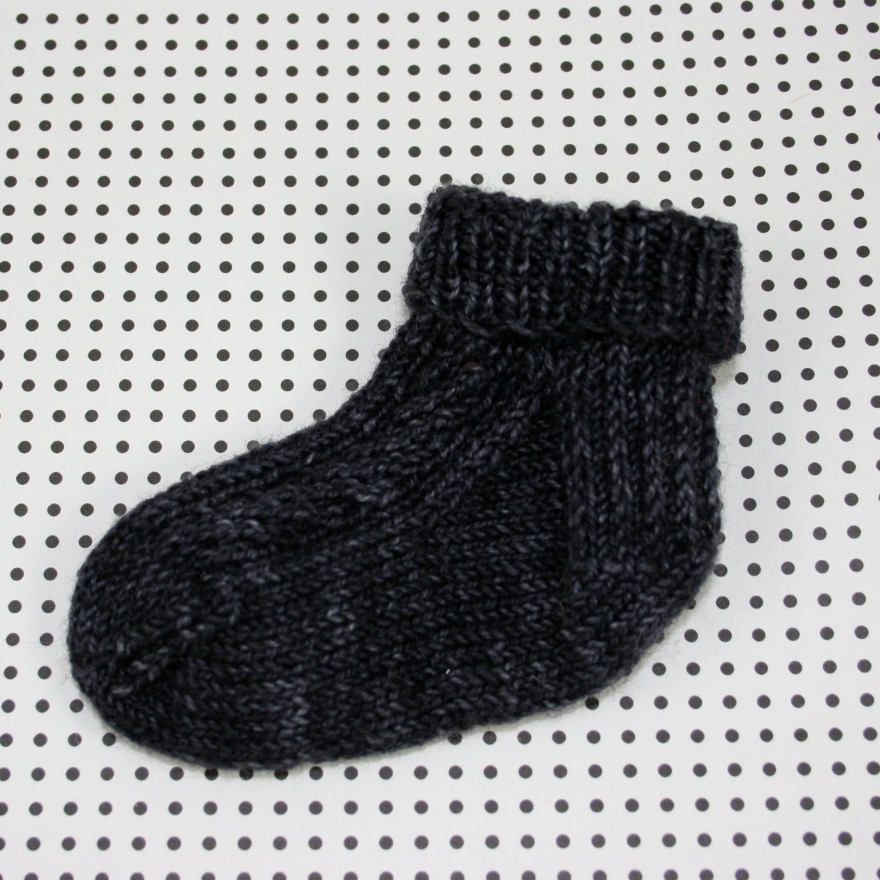
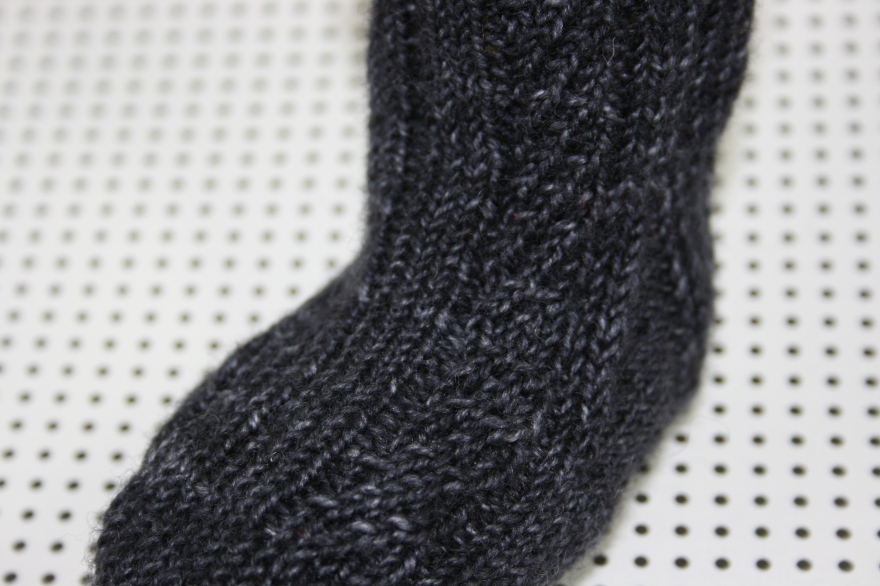
At the bottom of this post is the pattern, for a classic ribbed sock with a little mock-cable detail running the full length of the outside. I like to think they’re a little more sophisticated than your average handknit sock, which too often look like you’re either going to wear them to bed or on a hike. These were designed for a man who I’ve never seen wear trainers, or even slippers; so I was aiming for a sock that looked handmade and cozy, but wouldn’t be ridiculous if he put them on with Churches’. Therefore I went and chose yarn first and designed the pattern around that.

IMG_7724

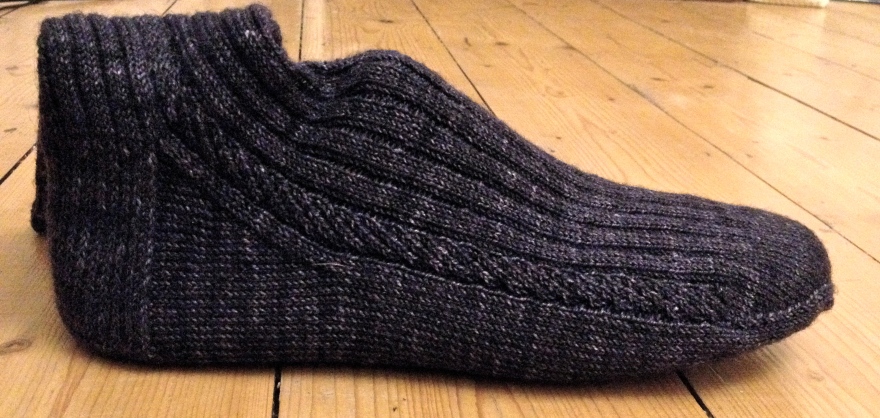
This Uncommon Thread Tough Sock yarn is lovely, it’s hand dyed to a tremendously civilised shade of charcoal. There is just enough deviation in tone to make it look unique and hand crafted, but not so much to tip the scales to rustic. Indie, not hippy.

Unfortunately it’s also expensive – £21 per 100g skein. Which I bought under the illusion that I would only need a single skein and therefore might as well buy the good stuff, but the first sock took up around two thirds of that so I was soon back at the till at Loop. (The leftover should be easy to find a home for though, given that it’s superwash I think it’ll make lovely baby socks for giving away to my many breeding friends.)

In the end I was really pleased with them! They looked professional and tasteful and that ticked all the boxes. And they were very well received, although Lucy made him a proper pair of completely bespoke leather shoes, from scratch, so that pretty much blew me out of the water. Honestly, they were insane, and please don’t underestimate my abounding pride… but I basically could’ve just bought him a box of Quality Street and saved myself the time.

IMG_7538.jpg

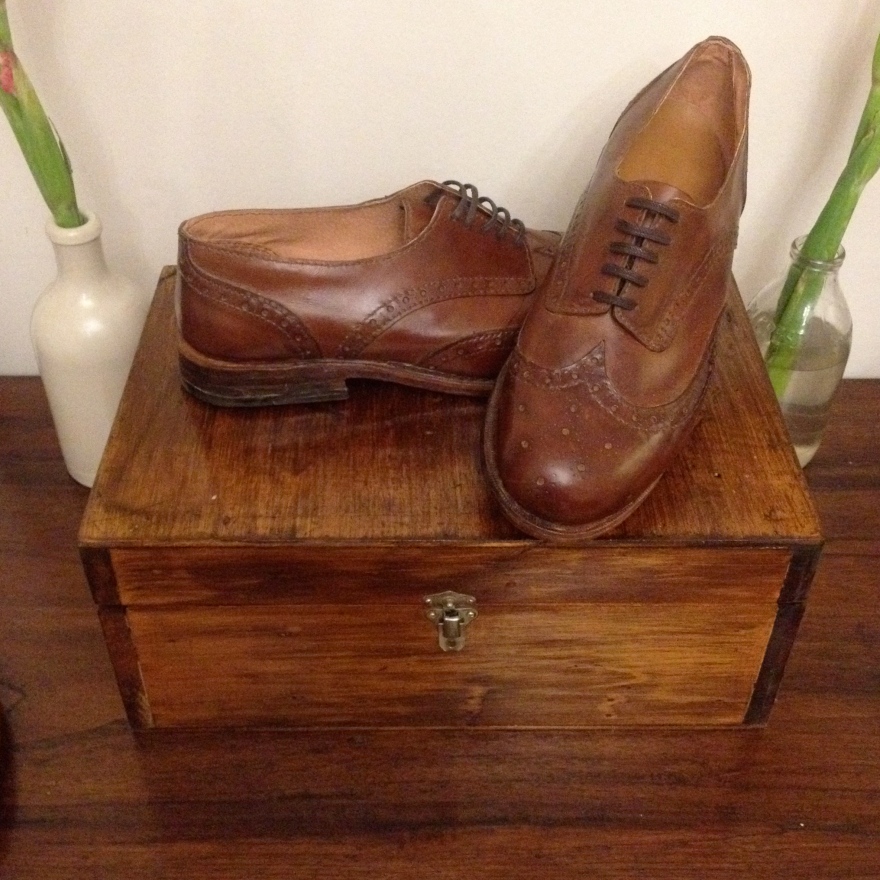
She really is a testament to what you can learn off of the internet. There are so many talented people out there keen to share what are arguably rare and dying skills, so no matter how ludicrous your dream of throwing pots in your bedsit or soldering metalwork with zero formal training may seem – don’t write it off!

(She’s working on a little tiny kids’ pair now, which are on their way to being crushingly adorable. I’ll think they’ll deserve a whole post of their own.)


Sock pattern:

Cast on 90sts using the long tail method. 2mm needles.


Left sock:

Leg:

Knit in 1×1 rib until work measures 3.5cm from start.

Change to 2.5mm needles.

Round 1:            K5, p1, (k3, p1) to end.

r2:            (K2tog and k into 1st st again before slipping both off needle) x2, k1, p1, (k3, p1) to end.

r3:            as round 1

r4:            K1, (k2tog and k into 1st st again before slipping both off needle) x2, p1, (k3, p1) to end.

Rounds 1-4 form the stitch repeat for the legs, continue until work measures 20cm from start, ending on round 4.


Heel flap:

K5, p1, k1, (sl 1 st with yarn in back, k1) x22, turn.

Sl 1st st, p43, turn.

These 44 stitches form heel flap.

Right side row: (sl 1 st with yarn in back, k1) to end.

Wrong side row: sl 1 st, p to end.

Repeat these two rows until heel flap measures 6.5cm.


Turning the heel:

Row 1:            Knit 24sts, ssk, k1, turn.

r2:            Slip 1, p5, p2tog, p1, turn.

r3:            Slip 1, knit to one stitch before gap (the slipped stitch from previous row),, ssk to close gap, k1, turn.

r4:            Slip 1, purl to one stitch before gap (the slipped stitch from previous row),, p2tog to close gap, p1 turn.

Repeat rows 3 and 4 until all sts have been worked. (24sts)


Gusset:

Knit 24sts of heel, pick up and knit 24sts along the left side of heel flap, k46sts of instep (keeping rib and travelling stitch pattern repeat), pick up and knit 24sts along left side of heel flap (118sts)

Place the marker here for the start of the round.

Round 1:            K46, k2tog, k1, (p1, k3) x9, p1, (K2tog and k into 1st st again before slipping both off needle) x2, k1, p1, k1, sl1 k1 psso, k23

r2:            k48, (p1, k3) x9, p1, k5, p1, k25

r3:            k45, k2tog, k1, (p1, k3) x9, p1, K1, (k2tog and k into 1st st again before slipping both off needle) x2, p1, k1, sl1 k1 psso, k22

r4:             k47, k5, p1, (p1, k3) x9, p1, k24

r5:            K44, k2tog, k1, (p1, k3) x9, p1, (K2tog and k into 1st st again before slipping both off needle) x2, k1, p1, k1, sl1 k1 psso, k21

r6:            k46, k5, p1, (p1, k3) x9, p1, k23

Continue decreasing in this way, decreasing 1 stitch at each side of the gusset on every other row, until 90 stitches remain.

IMG_7249


Foot:

Continue working these 90 stitches, keeping rib and travelling stitch pattern correct, until the measurement from the back of the heel is 23cm (or 3.75cm less than the length of the foot of the intended wearer).


Toe shaping:

Add 2 stitch markers splitting the sock into halves, 45sts between markers.

r1:            knit along sole to 3sts from marker, k2tog, k1, (pass marker) k1, sl1 k1 psso, knit along instep to 3sts from marker, k2tog, k1, (pass marker) k1, sl1 k1 psso, k to end.

r2:            knit all sts

These 2 rounds form decreasing pattern, repeat until 23sts remain between markers, 46sts total. Ending on round 1/

Next round, as round 1.

Repeat round 1, decreasing every round, until there are only 15sts between markers, 30sts total.


Graft toes closed using Kitchener stitch.


IMG_7739

Right sock:

Leg:

Knit in 1×1 rib until work measures 3.5cm from start.

Change to 2.5mm needles.

Round 1:            (k3, p1) to last 6 sts, k5, p1.

r2:            (k3, p1) to last 6 sts, (k2tog and k into 1st st again before slipping both off needle) x2, k1, p1.

r3:            as round 1

r4:            (k3, p1) to last 6 sts, k1, (k2tog and k into 1st st again before slipping both off needle) x2, p1.

Rounds 1-4 form the stitch repeat for the legs, continue until work measures 20cm from start, ending on round 4.


Heel flap:

(K3, p1) x9, k2, (sl 1 st with yarn in back, k1) x22, turn.

Sl 1st st, p43, turn.

These 44 stitches form heel flap.

Right side row: (sl 1 st with yarn in back, k1) to end.

Wrong side row: sl 1 st, p to end.

Repeat these two rows until heel flap measures 6.5cm.


Turning the heel:

Row 1:            Knit 24sts, ssk, k1, turn.

r2:            Slip 1, p5, p2tog, p1, turn.

r3:            Slip 1, knit to one stitch before gap (the slipped stitch from previous row), ssk to close gap, k1, turn.

r4:            Slip 1, purl to one stitch before gap (the slipped stitch from previous row), p2tog to close gap, p1 turn.

Repeat rows 3 and 4 until all sts have been worked. (24sts)


Gusset:

Knit 24sts of heel, pick up and knit 24sts along the left side of heel flap, k46sts of instep (keeping rib and travelling stitch pattern repeat), pick up and knit 24sts along left side of heel flap (118sts)

Place the marker here for the start of the round.

Round 1:            K46, k2tog, k1, p1, (K2tog and k into 1st st again before slipping both off needle) x2, k1, (p1, k3) x9, p1, k1, sl1 k1 psso, k23

r2:            k48, p1, k5, (p1, k3) x9, p1, k25

r3:            k45, k2tog, k1, p1, K1, (k2tog and k into 1st st again before slipping both off needle) x2, (p1, k3) x9, p1, k1, sl1 k1 psso, k22

r4:             k47, p1, k5, (p1, k3) x9, p1, k24

r5:            K44, k2tog, k1, p1, (K2tog and k into 1st st again before slipping both off needle) x2, k1, (p1, k3) x9, , k1, sl1 k1 psso, k21

r6:            k46, k5, p1, (p1, k3) x9, p1, k23

Continue decreasing in this way, decreasing 1 stitch at each side of the gusset on every other row, until 90 stitches remain.


Foot:

Continue working these 90 stitches, keeping rib and travelling stitch pattern correct, until the measurement from the back of the heel is 23cm (or 3.75cm less than the length of the foot of the intended wearer).


Toe shaping:

Add 2 stitch markers splitting the sock into halves, 45sts between markers.

r1:            knit along sole to 3sts from marker, k2tog, k1, (pass marker) k1, sl1 k1 psso, knit along instep to 3sts from marker, k2tog, k1, (pass marker) k1, sl1 k1 psso, k to end.

r2:            knit all sts

These 2 rounds form decreasing pattern, repeat until 23sts remain between markers, 46sts total. Ending on round 1/

Next round, as round 1.

Repeat round 1, decreasing every round, until there are only 15sts between markers, 30sts total.


Graft toes closed using Kitchener stitch.

IMG_7736

Multi stitch, linen yarn dress

Started out with an idea and some swatches.

IMG_7588.JPG

IMG_7589.JPG

IMG_7592.JPG

And got cracking when the weather was still bright.

IMG_7774.JPG

It’s grown through the strappy top section.

IMG_7812.JPG

Through the diamonds of the waist section.

IMG_7947.JPG

To adding heaps more stitches for the skirt section.

IMG_8277.JPG

And I’m not bored yet!! So it’s still growing.

IMG_6137-0.JPG

IMG_6139-0.JPG

IMG_6140-0.JPG

IMG_6142-0.JPG

While it’s on the circular needle I can’t really tell how full or A line the skirt will be, but it takes me a whole evening to do two rounds with this many stitches so I’m guessing it’s huuuuuge.

On knitting a random scarf, including a pattern to make your own!

apricot knitted scarf on bricks

This is another instance of impulse buying yarn. I’d popped into Loop, killing some time on the way to my sister-in-law’s-es flat I think, and I’d felt the sort of engulfing craft-stress one gets when there’s so much awesome stuff around that even if you quit your job and gave up sleep you couldn’t make even a fraction of the things you’d like to. Lucy was hanging out in the nice little seating area which serves as a man-crèche, popular in yarn shops everywhere, and not wanting to out-stay her patience I was more decisive than I probably would’ve been on my own! I’d picked up a skein of Malabrigo lace in apricot, which I was finding it hard to part with, plus I couldn’t step away from the carousel of Madeline Tosh’s Unicorn Tails; so I took one of each of those, with a soft grey to bring them together and figured I’d come up with a plan later.

striped knit shawl free pattern

I quickly decided I wanted a scarf, specifically a triangular shawl which I could wear wrapped around front-to-back for the autumn. I wanted a sort of make-it-up-as-you-go-along pattern, which wouldn’t matter how big it was or what tension it was or any silly things like that, which I could just start and trot along with until I ran out of yarn / couldn’t be bothered any more. I cast on at the centre of the top edge and  just increased at the centre and edge of every right-side row hoping for the best. The colour and stitch was striped at random, while keeping faintly aware of spacing everything out in way that I personally liked. The main section is just knit and pearl rows, forming a kind of irregular garter stitch, with rows of eyelet holes thrown in every now and then to give a lacy texture. The edge has chevrons to finish, but this is optional and the results have mixed success; although I like the look I do find that it pulls the shape in and actually makes the length a little shorter than it would be otherwise.

knitted lace merino scarf free pattern

Below is a basic instruction for making this scarf, or at least one fairly similar because it genuinely does progress at random. I hope someone has a go and has fun with this! I am planning to develop it into a comprehensive, step-by-step pattern for real beginners. It will introduce the basic pattern, stitch stripes and then colour stripes one by one to teach these different ideas slowly, ending with the more complicated chevron stitch when your confidence has grown. If you think this might be better for you than winging it – stick around :)


Fairly vague directions for knitting a random scarf:


Yarns:

Whatever you like!

My scarf uses Madeline Tosh Unicorn Tails (x1 in ‘dirty panther’, 47m), Malabrigo Lace (x1 in ‘072 apricot’, 50g) and BC Garn Semilla Organic Lace (x1 in ‘light grey’, 50g). All 100% merino, in various weights.

I would recommend choosing yarns which have slightly different weights or textures, perhaps one which is fluffier than the others, or finer, or maybe with an uneven or slubby texture.


Needles:

Who cares!

I used 4mm needles as this gave a fairly loose tension for the yarns I’d chosen.

I would recommend doing a little tension swatch using your different yarns. You’re looking for a looser, more open knit than you might usually, so try using needles 1mm bigger than the ones suggested on your ball band.

tension swatch chevron knit with ball bands


Abbreviations:

yo:          yarn over needle, to make a new stitch

k2tog:   knit 2 stitches together, to decrease a stitch

tbl:        knit through the back of the loop

sl1:        slip one stitch from left to right needle without knitting

psso:     pass the slipped stitch over, to decrease a stitch


To make: (basic pattern in garter stitch)

Cast-on 8 stitches, knit one row for foundation

Row 1:  K3, (yo, k1, yo, k3) x2

Row 2 (and all even rows): knit all sts

R3:          K3, (yo, k3, yo, k3) x2

R5:          K3, (yo, k5, yo, k3) x2

R7:          K3, (yo, k7, yo, k3) x2

R9:          K3, (yo, k9, yo, k3) x2

Continue in this way, with 3 stitches at each side and centre bordered by yo’s. Each pair of rows will increase the total number of stitches by 4.

Continue until centre length is at least 40cm, on a right side row cast off all stitches (see below for chevron edge option).


To make the scarf with stitch stripes:

Every row can be either knit or pearl, try doing a few rows as a block of stocking stitch or reverse stocking stitch, and experiment with different combinations of rows.

Add in an eyelet row every now and then following this pattern:

R1:          K3, yo, k1, (k2tog, yo) repeat until 1 or 2 stitches are left before the central set of 3 sts, k these 1 or 2 sts, yo ,k3 , yo, k1, (k2tog, yo) repeat until 1 or 2 stitches are left before the final set of 3 sts, k these 1 or 2 sts, yo ,k3.

R2:          K all sts

knit random colour and stitch stripes


To make the scarf with colour stripes:

Colour blocks should be a multiple or 2 rows, this will mean that all of the yarn ends are at one edge of the scarf and the yarns not being used can be carried up the side edge. Bear in mind that you may not have equal amounts of each of your colours and will need to spread the smaller amounts through the scarf. If you would like to make sure you will have enough to make every colour reach the end of the scarf you might like to weigh each ball at the beginning and at intervals throughout the work to keep knitting them in the same proportions.

For example, my scarf starts like this:

Rows1-7: light grey (A)

R8-11:      apricot (B)

R12-13:   dark grey (C)

R14-15:   B

R16-19:   A

R20-25:  B

R26-27:  C

R28-33:  A

Remember: wrap the yarn you are using around the other two before the first stitch of each right side row, this will keep them neat and safe running along one edge of your scarf. (You could cut the yarn every time you finish a colour stripe and sew the ends in, and if you’ve got time for that good luck to you.)

colour change edge


To make the scarf with a chevron edge:

You will need a multiple of 23sts +3 in between the yo’s on each side. For example, 337sts in total means you have 143sts inbetween the yo’s*. Follow the chart below for 16 rows to make the edge. Please note that the chart shows the chevrons in a basic garter stitch, but you can change this to stripes of stocking stitch or whatever you fancy to fit in with the rest of your scarf.

knitting chart for chevron edge

knitted chevrom edge centre

Stuff to do and a desk to do it at.

My table is clear and usable for the first time in MONTHS! I am sitting at my computer like a civilised human, not scrunched over it on my lap like the last picture in a comedy ‘evolution of man’ illustration. Lucy moved in with me nearly a month ago :D and although the co-habiting is lovely, my tiny flat has had an onslaught of possessions that has been tricky to work through. But last night the in-laws came for a celebratory housewarming paella so we really had to get a grip and make the place nice. The evening was lovely and they brought us many delightful gifts (including a drill set which we are crazy excited about) but the best part for me is probably the re-discovery of my dining table and today’s prospect of a whole day to work at it! I am starting with a breakfast of some toast made from the roasted garlic loaf I made yesterday and writing this little update. breakfast I’m keen to get the sewing machine out and make more cushions. I have a heap of unloved knitwear brought home from work. I have sold some cushions from the Etsy shop! Admittedly, only to my adorable friend Pete, but a sale is a sale. Plus I’ve had some interest from my Lucy’s parents who would consider selling some in their fancy interiors store, so I should really up my game for them and make a few with proper labels and fastenings. I’m thinking it would be good to embroider labels with ‘Milkbottle’ and some fabric/care info, I just need to find the best way to do that quickly and simply. Embroidery-wise I’m pushing to get this guy finished: art macabre cross stitch The cross-stitch of Raven Rouge at the Art Macabre death drawing session from ages ago. The lovely lady who is the subject of this picture has shown an interest in having it when it’s done, so that’s giving me the incentive I needed to actually crack on! I’d also like to get the girls-in-knickers embroideries framed up today. I’ve acquired two vintage hoops (thanks to a recent bout of ebay addiction) which I think will be perfect. I’ll put these up for sale too, although I’ve no idea how much for yet. girls in knickers embroideries And I signed up for the certificate course at the Royal School of Needlework! I’m so excited. I’ll be starting Jacobean Crewelwork at the end of June. Going to have a nice day out to Hatfield House to get some Jacobean inspiration. The assessment criteria are pretty strict on this module, holding me very close to a traditional tree of life design. No room for naughtiness. Not that Jacobean is the most inspiring medium for subversive subject matter. It’s the silk shading module that is most tempting – I desperately want to stitch pubic hair while everyone else is doing kittens and pansies. Lucy’s Christmas jumper is coming on nicely: I’m up to the fair-isle section on the front now. Those two massive balls of yarn which I got at Ally Pally last year are stretching really far. Once I’ve finished both the body panels I’ll weigh the green again and split what’s left into two balls, and that will pretty much dictate the design of the sleeve. Lots of green will mean the possibility of more detailed fair isle and a shorter white section at the top, only a little will mean a short green cuff with a simple design to transfer to the white. It’s fun to make this up as I go along! Just need to make sure that the angle at the top of the sleeve runs smoothly into the shoulder and we’ll be golden :) fair isle knitted jumper And just for a little dose of cuteness I’ve been making these baby socks too: cable baby socks Sometime I feel super frustrated with myself for mot getting much done, but actually when I look at things laid out like this I am pretty happy with what I manage to do. If only I didn’t have to go to work!

Upcycled cushions

My Etsy shop is growing! Very slowly. It takes me hours to put items up there! Is that normal or am I fannying about? Dallying with photos and rephrasing tiny pieces of text probably.

But it is fun :) And I have sold a cushion! Plus two out of the three pairs of baby shoes have gone. I’m working on some more embroideries to sell, I’ve bought some more brass frames and some vintage hoops too. Hopefully I can push the more racy subject matter on the next ones! Is it wrong to sell baby gifts and mildly pornographic images in the same shop? I suppose it’s fine, it’s not like children will actually be shopping there, and I don’t really like easily offended grown-ups anyway.

These cushions are made from samples which I’ve salvaged from work. We have so many beautiful garments which have to be cut up, disected or damaged, as a necessary part of the product development process. So to save the best quality knits from the scraps bin I have been upcycling them into cushion covers and they are looking quite nice!

The cushion pads are all brand new, either feather from John Lewis or polyester from Ikea. Frankly these are a total bargain! Where else do you think you’ll get a cashmere cushion for nineteen quid?!

https://www.etsy.com/uk/shop/milkbottleknits

Image

More Christmas present progress

This is the mitten kit that my mum picked out at Ally Pally – ‘Knit Like a Latvian’, apparently. We kind of agreed that she wouldn’t mind receiving it in kit or mitten form when it came to the crunch, but to be honest I don’t think the knitting part of this would be her cup of tea. That having been said, I don’t think it’s my cup of tea either.
Fuck me, it’s slow!! The Latvians of yore must’ve been short on other forms of entertainment.
It is growing though. And, thanks to a signal failure in the Finsbury Park area that delayed my train by like 40 minutes this morning, I’m even further along than the photo now. Sometimes it’s fun, and I am kinda proud of myself because I’ve never done any fair isle before, but I’m struggling to be ok with the less-than-perfect tension and stitch size which I’m guessing is actually part of the charm. My mum’ll like it, but frankly I could make her a coil-pot ashtray like I did when I was four (she doesn’t smoke) and she’d like that too – she’s a good mum, all artwork makes it to the fridge door.
So this is mitten one, unfinished at 21 days before The Event. Thank god her birthday is in January and she’ll probably be ok with not getting the second one until then!

20131202-123342.jpg

Cushion front compete :)

The front of my striped, cable cushion is done! This took almost a whole ball in each colour of Cygnet ‘Seriously Chunky’, so in total that’s nearly 400g to fit a 55cm square cushion pad. Can’t start on the back though because I haven’t got any more yarn but eventually it’ll be in cream with an overlap opening.

In fact, I’m going to make a full cover for this chair mostly in cream. This cushion was sort of a trial of the yarn before I go ahead and buy 40 balls of the stuff. (That’s why I’ve gone for 100% acrylic here – this was more about quantity than quality – but actually it’s not so offensive as I’d expected!)

Still don’t have a moving date for my flat. It’s annoying more than anything else, just waiting for other people to do whatever it is they do. Making homely things is simultaneously keeping me busy and making me impatient!

New home cushion cover

The potential new home is getting closer :) I don’t have a date for exchange, but I’ve started making cushions anyway. This is a test of the yarn really, which is just super cheap acrylic at £2 a ball, aim is to make a cover for an ikea armchair.

(As I’m TEMPORARILY living with my mother I am TEMPORARILY a cat lady. Miffy has been my lovely assistant for the evening…)