Knitted baby blanket

IMG_6537

It’s a simple idea:

Cast-on with 51 stitches and knit in garter stitch. Every right side row, reduce the centre 3sts down to 1 by slipping one stitch, knitting the next two together and then passing the slipped stitch over. After 12 rows in your main colour, change to a highlight. When you get down to 3 stitches, purl all 3 together on the next wrong side row and fasten off.

IMG_6534IMG_6541IMG_6542

Four matching small squares are sewn together to make a big square.

Then the big squares will be sewn together to make an even bigger square!

IMG_6549

(I’m mildly concerned that my seams are a fat on the reverse, but I guess all blankets made in patches are like this. And I’m sure it’ll condense a bit in the blocking anyway)

IMG_6546

I’ve used Drops yarn for this project. Their yarns are great quality, inexpensive, washable, and varied in both colour and fibre choices. The grey is their baby merino and the highlight colours are baby alpaca silk.

IMG_6553

I’m hoping to have it finished in the autumn so I’ve got a long way to go! Perfect vacation project though, I’m sure I can bash out a fair few before the summer’s over.

Free pattern – mini rib and cable sock

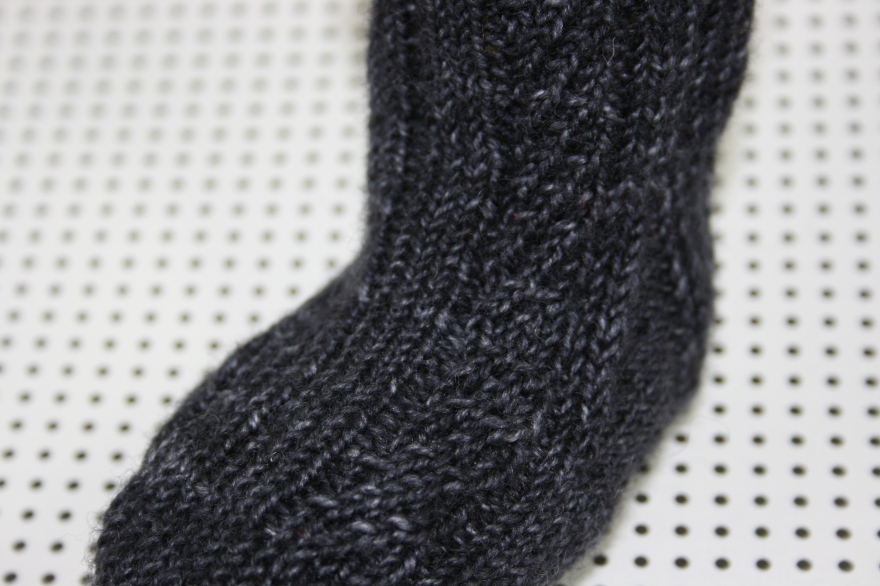
This is the baby-scale version of the men’s sock pattern which I put up here a few weeks back. I bought 2 skeins of the Uncommon Thread Tough Sock for the full size pattern and had enough left over to knit these little guys plus a baby hat to match! I’ve only gotten one sock finished, but I’ve weighed the rest of the yarn and I’ll be fine. In fact I’ve got so much left that I think I should’ve made the socks a little longer in the leg.

IMG_5955

IMG_5967

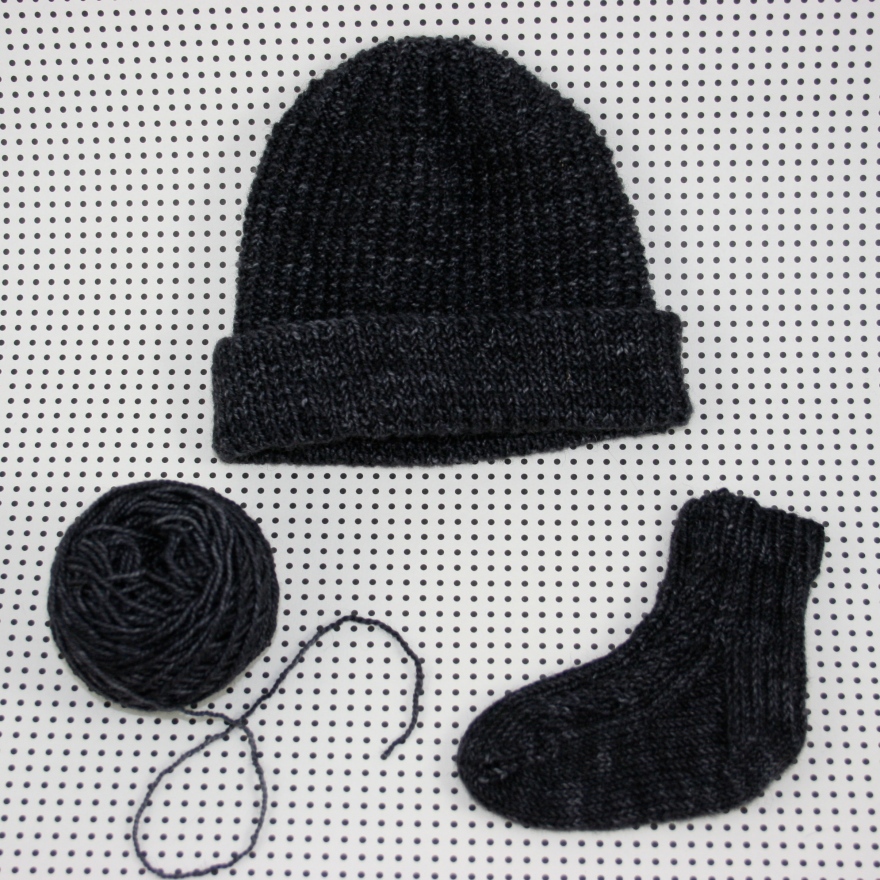
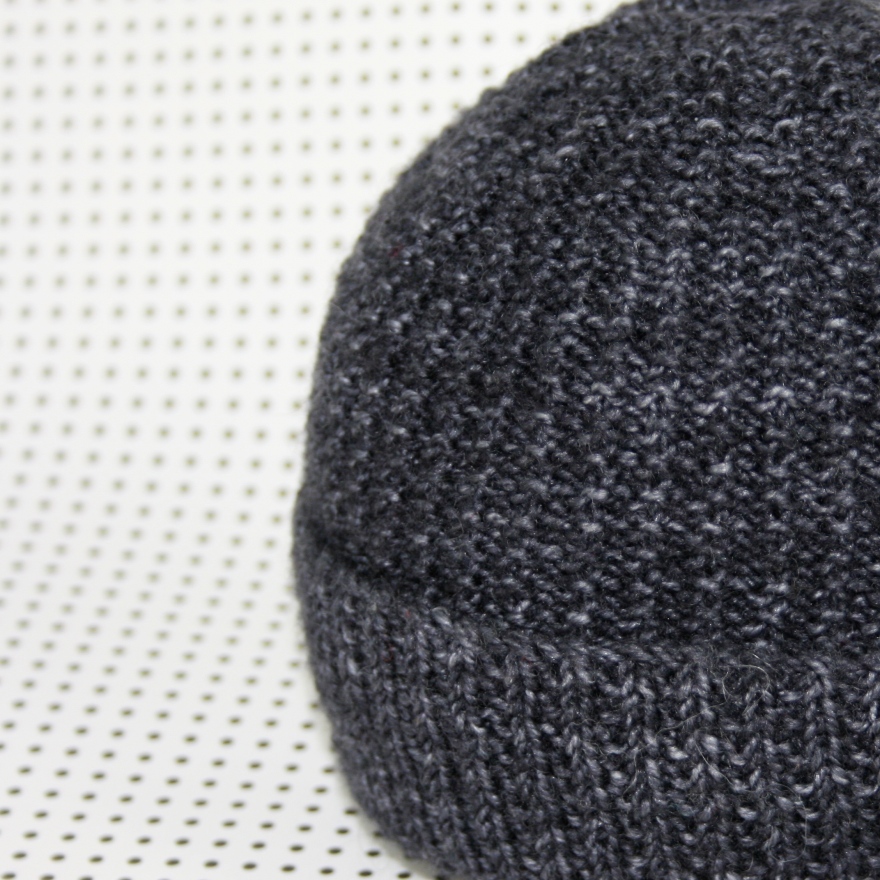
The hat pattern is from Debbie Bliss’ book Ultimate Baby knits, which I’ve used extensively. I would thoroughly recommend it to anyone, but especially those in their late 20’s with a lot of heterosexual female friends – trust me, they’ll drop like flies and every pattern in here is an absolute gem. Buy yourself a job lot of baby cashmerino in grey and prepare for the onslaught.

IMG_5970

IMG_5973

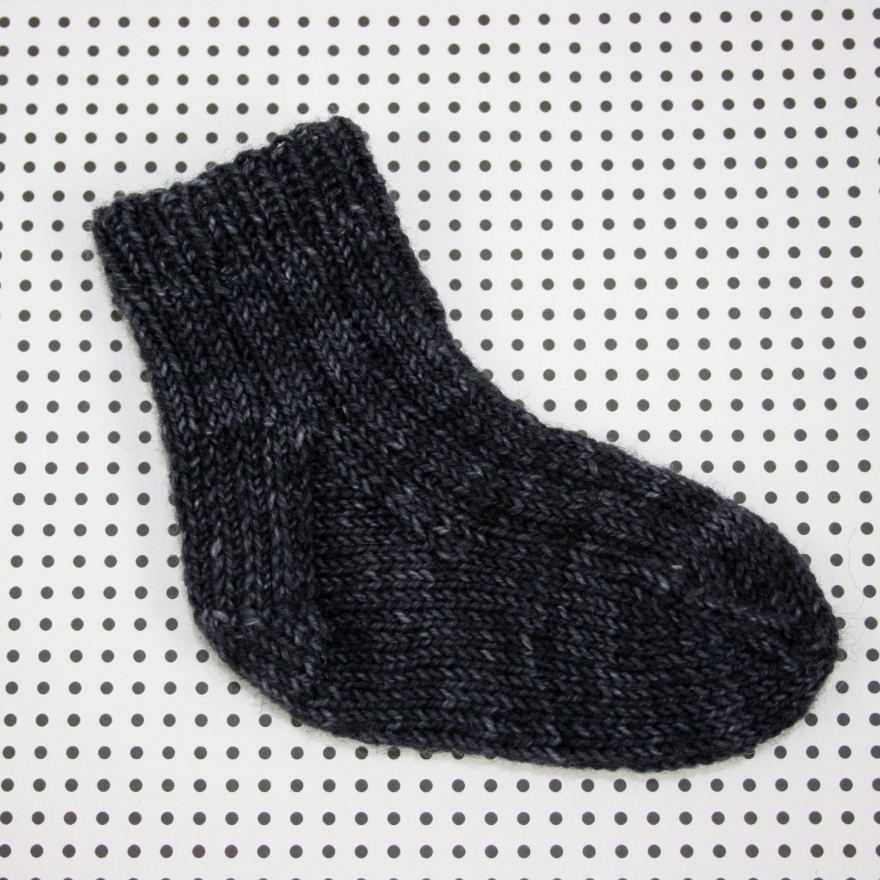
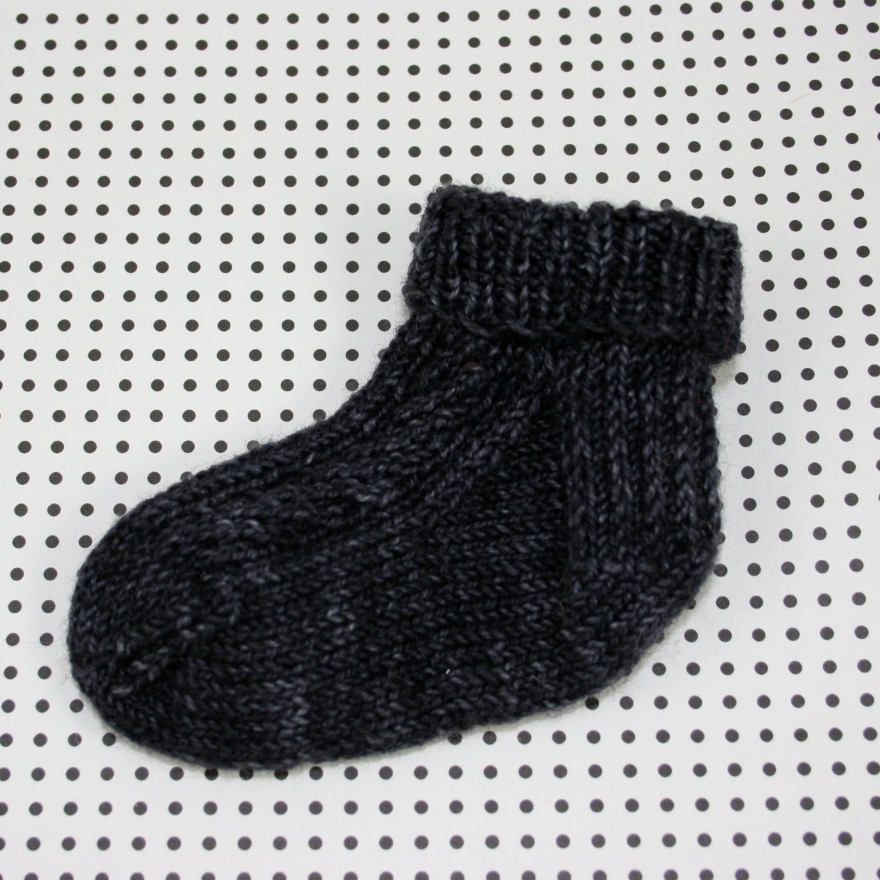
These socks are carbon copies of the grown up ones, but at approximately half the scale. The proportion of the heel turn and gusset have been tweaked a little for a chubby baby foot, and the lengths of leg and foot are much smaller than 50%, but the look is an adorable mini-me of the original.

IMG_5957


Mini Mens Rib and Cable Sock:

Abbreviations:

sl:            slip

psso:      pass the slipped stitch over

ssk:         slip one stitch, slip the next stitch, the two slipped stitches together

k2tog:    knit two together


Left sock:

Cuff:

Cast on 42sts using the long tail method. 2.5mm needles.

Knit in 1×1 rib for 10 rows.


Leg:

Round 1: K5, p1, (k3, p1) x9.

r2:            (K2tog and k into 1st st again before slipping both off needle) x2, k1, p1, (k3, p1) to end.

r3:            as round 1

r4:            K1, (k2tog and k into 1st st again before slipping both off needle) x2, p1, (k3, p1) to end.

Rounds 1-4 form the stitch repeat for the travelling stitch detail.

Repeat rounds 1-4 twice more.


Heel flap:

K5, p1, k1, (sl 1 st with yarn in back, k1) x10, k1, turn.

Sl 1st st, p20, turn.

These 21 stitches form heel flap.

Right side row: (sl 1 st with yarn in back, k1) to last st, k1.

Wrong side row: sl 1 st, p to end.

Repeat these two rows until heel flap measures 6.5cm.


Turning the heel:

Row 1:     Knit 13sts, ssk, k1, turn.

r2:            Slip 1, p6, p2tog, p1, turn.

r3:            Slip 1, knit to one stitch before gap (the slipped stitch from previous row), ssk to close gap, k1, turn.

r4:            Slip 1, purl to one stitch before gap (the slipped stitch from previous row), p2tog to close gap, p1 turn.

Repeat rows 3 and 4 until all sts have been worked. (13sts)


Gusset:

Knit 13sts of heel, pick up and knit 11sts along the left side of heel flap, k21sts of instep (keeping rib and travelling stitch pattern repeat), pick up and knit 11sts along left side of heel flap (56sts)

Place the marker here for the start of the round.

Round 1: K22, k2tog, k1, (p1, k3) x3, p1, (K2tog and k into 1st st again before slipping both off needle) x2, k1, p1, k1, sl1 k1 psso, k9

r2:            k24, (p1, k3) x3, p1, k5, p1, k11

r3:            k21, k2tog, k1, (p1, k3) x3, p1, K1, (k2tog and k into 1st st again before slipping both off needle) x2, p1, k1, sl1 k1 psso, k8

r4:             k23, (p1, k3) x3, p1, k5, p1, k10

r5:            K20, k2tog, k1, (p1, k3) x3, p1, (K2tog and k into 1st st again before slipping both off needle) x2, k1, p1, k1, sl1 k1 psso, k7

r6:            k22, (p1, k3) x3, p1, k5 p1, k9

Continue decreasing in this way, decreasing 1 stitch at each side of the gusset on every other row, until 42 stitches remain.


Foot:

Continue working these 42 stitches, keeping rib and travelling stitch pattern correct, until the measurement from the back of the heel is 8cm (or 2.5cm less than the length of the foot of the intended wearer).


Toe shaping:

Using 2 stitch markers split the sock into two halves, 21sts between markers.

r1:            knit along sole to 2sts from marker, k2tog, (pass marker), sl1 k1 psso, knit along instep to 2sts from marker, k2tog, (pass marker), sl1 k1 psso, k to end of round.

r2:            knit all sts

These 2 rounds form decreasing pattern, repeat until 15sts remain between markers, 30sts total. Ending on round 1.

Next round, as round 1.

Repeat round 1, decreasing every round, until there are only 7sts between markers, 14sts total.


Graft toes closed using Kitchener stitch.


Right sock:

Cast on and knit cuff as left sock


Leg:

Round 1: (k3, p1) x9, K5, p1

r2:            (k3, p1) to last 6sts, (k2tog and k into 1st st again before slipping both off needle) x2, k1, p1.

r3:            as round 1

r4:            (k3, p1) to last 6 sts, k1, (k2tog and k into 1st st again before slipping both off needle) x2, p1.

Rounds 1-4 form the stitch repeat for the travelling stitch detail.

Repeat rounds 1-4 twice more.


Heel flap:

(K3, p1) x3, k1, (sl 1 st with yarn in back, k1) x10, k1, turn.

Sl 1st st, p20, turn.

These 21 stitches form heel flap.

Right side row: (sl 1 st with yarn in back, k1) to last st, k1.

Wrong side row: sl 1 st, p to end.

Repeat these two rows until heel flap measures 6.5cm.


Turning the heel:

Row 1:    Knit 13sts, ssk, k1, turn.

r2:           Slip 1, p6, p2tog, p1, turn.

r3:           Slip 1, knit to one stitch before gap (the slipped stitch from previous row), ssk to close gap, k1, turn.

r4:           Slip 1, purl to one stitch before gap (the slipped stitch from previous row), p2tog to close gap, p1 turn.

Repeat rows 3 and 4 until all sts have been worked. (13sts)


Gusset:

Knit 13sts of heel, pick up and knit 11sts along the left side of heel flap, k21sts of instep (keeping rib and travelling stitch pattern repeat), pick up and knit 11sts along left side of heel flap (56sts)

Place the marker here for the start of the round.

Round 1: k22, k2tog, k1, p1, k5, (p1, k3) x3, p1, k1, sl1 k1 psso, k9

r2:            k24, p1, k1, (k2tog and k into 1st st again before slipping both off needle) x2, (p1, k3) x3, p1, k11

r3:            k21, k2tog, k1, p1, k5, (p1, k3) x3, p1, k1, sl1 k1 psso, k8

r4:            k23, p1, (k2tog and k into 1st st again before slipping both off needle) x2, k1, (p1, k3) x3, p1, k10

r5:            k20, k2tog, k1, p1, k5, (p1, k3) x3, p1, k1, sl1 k1 psso, k7

r6:            k22, p1, k1, (k2tog and k into 1st st again before slipping both off needle) x2, (p1, k3) x3, p1, k9

Continue decreasing in this way, decreasing 1 stitch at each side of the gusset on every other round, until 42 stitches remain.


Foot:

Continue working these 42 stitches, keeping rib and travelling stitch pattern correct, until the measurement from the back of the heel is 8cm (or 2.5cm less than the length of the foot of the intended wearer).


Toe shaping:

Using 2 stitch markers split the sock into two halves, 21sts between markers.

r1:            knit along sole to 2sts from marker, k2tog, (pass marker), sl1 k1 psso, knit along instep to 2sts from marker, k2tog, (pass marker), sl1 k1 psso, k to end of round.

r2:            knit all sts

These 2 rounds form decreasing pattern, repeat until 15sts remain between markers, 30sts total. Ending on round 1.

Next round, as round 1.

Repeat round 1, decreasing every round, until there are only 7sts between markers, 14sts total.


Graft toes closed using Kitchener stitch.

Crochet elephant, another Ed’s animal

These animals from Kerry Lords’ Edward’s Menagerie pattern collection are endlessly brilliant! Previously I adapted the zebra pattern to make a unicorn, and my friend Susan commissioned two from me for her daughter and her friend. When Sooz told me she was expecting another baby it seemed logical to me that an elephant and a unicorn would make a pair, and as it happened I had this ball of grey yarn stashed which is super beautiful!

IMG_9026

It looks almost like marble when it’s crocheted up and has a very dense, cozy texture like a snuggly felt. I must confess to losing the ball band, but I think it was Rowan tweed of some kind. I went looking for some more recently but I couldn’t see the right colour way, I’m hoping it pops back up in the summer so I can make some more marble-y creatures. (Perfect for the constant stream of pregnant, minimalist, Scandi colleagues I have at COS HQ.)

IMG_9033

I crocheted the unicorns’ tail, but it went all whirly like a cartoon piglet and I wasn’t too happy with it. (Although, to be fair no one can dispute the potential accuracy of my unicorn tail, so who cares?!) To improve on that for the elephant tail I dug out a lucet. Now, I honestly try very hard not to be a hoarder; but when you realise you’ve been keeping not one but two medieval braid tools in your home for at least 15 years you clearly have a problem.

For those of you who didn’t spend your formative years accumulating the stock of every single stall at the craft fair, this is a lucet:

IMG_9031

It makes a simple square braid by wrapping yarn around the prongs and lifting the loops over, similar to a knitting dolly if I remember rightly. There are plenty of tutorials on youtube, which is how I refreshed my memory on how to use this, or you could follow a pictorial tutorial like this one from the pertinent website lucets.com.

IMG_9035

The finished guy has charmed everyone, most of whom pop their little finger up his trunk which seems faintly inappropriate. He’s also been well received at the home of new arrival Elijah Curtis and I hope he gets dragged around for years to come until he’s super gross, a bit threadbare and missing some appendages.

IMG_9028

Tattooed unicorn and jacobean crewelwork day 3

Made some more progress in the third day of the certificate course at the RSN. Learnt two new stitches – heavy chain…

heavy chain embroidery stitch


(unfortunately hard to see in the dark colour!)

and raised stem band…

raised stem band embroidery stitch


raised stem band crewel embroidery

So currently the Tree of Life is up to this stage…

RSN jacobean crewelwork tree of life - day 3

Still a very long way to go! And a long list of homework to tackle before next month.


And in the mean time I have been practicing my embroidery skills on the unicorn I crocheted recently. I think he looks good for it! The back stitch I started out using turned out to be far too thin, I needed the stronger stem stitch to make a decent line. Would also like to make him a little shirt with rolled up sleeves.

If you’re interested in making your own, I used the Toft Alpaca pattern for the zebra, from Edwards Menagerie, and then added my own style of horn and mane. Their pattern base is great and very versatile – really easy to personalise into pretty much any creature you like.

embroidered tattoo unicorn - left embroidered tattooed unicorn - front embroidery tattooed unicorn - right

I feel like you don’t see enough masculine unicorns. Maybe that’s where they went wrong.

Upcycled cushions

My Etsy shop is growing! Very slowly. It takes me hours to put items up there! Is that normal or am I fannying about? Dallying with photos and rephrasing tiny pieces of text probably.

But it is fun :) And I have sold a cushion! Plus two out of the three pairs of baby shoes have gone. I’m working on some more embroideries to sell, I’ve bought some more brass frames and some vintage hoops too. Hopefully I can push the more racy subject matter on the next ones! Is it wrong to sell baby gifts and mildly pornographic images in the same shop? I suppose it’s fine, it’s not like children will actually be shopping there, and I don’t really like easily offended grown-ups anyway.

These cushions are made from samples which I’ve salvaged from work. We have so many beautiful garments which have to be cut up, disected or damaged, as a necessary part of the product development process. So to save the best quality knits from the scraps bin I have been upcycling them into cushion covers and they are looking quite nice!

The cushion pads are all brand new, either feather from John Lewis or polyester from Ikea. Frankly these are a total bargain! Where else do you think you’ll get a cashmere cushion for nineteen quid?!

https://www.etsy.com/uk/shop/milkbottleknits

Image

More Christmas present progress

This is the mitten kit that my mum picked out at Ally Pally – ‘Knit Like a Latvian’, apparently. We kind of agreed that she wouldn’t mind receiving it in kit or mitten form when it came to the crunch, but to be honest I don’t think the knitting part of this would be her cup of tea. That having been said, I don’t think it’s my cup of tea either.
Fuck me, it’s slow!! The Latvians of yore must’ve been short on other forms of entertainment.
It is growing though. And, thanks to a signal failure in the Finsbury Park area that delayed my train by like 40 minutes this morning, I’m even further along than the photo now. Sometimes it’s fun, and I am kinda proud of myself because I’ve never done any fair isle before, but I’m struggling to be ok with the less-than-perfect tension and stitch size which I’m guessing is actually part of the charm. My mum’ll like it, but frankly I could make her a coil-pot ashtray like I did when I was four (she doesn’t smoke) and she’d like that too – she’s a good mum, all artwork makes it to the fridge door.
So this is mitten one, unfinished at 21 days before The Event. Thank god her birthday is in January and she’ll probably be ok with not getting the second one until then!

20131202-123342.jpg

Christmas present progress

My lovely friend Lauren has been a big fan of the embroideries I’ve been doing lately, and she’s requested one of her own for Christmas. So this weekend I got the fear and figured I should get a shift on with that.
So here’s the work so far. I’m quite pleased, although I wish I’d done it on a more tightly woven fabric because this is getting quite distorted and I’m a bit worried about trying to steam it flat! Her face is nice though, and the hands are less terrible than they could be. I’m sewing this in Appletons crewel wools, which I think I enjoy more than the usual embroidery floss, and trying to get tones in without any background shading. Fingers crossed she’ll end up as a nice piece.

20131202-112133.jpg

Pink Hair, Red Knickers embroidery

Image

I’m pleased with how this turned out :) I traced out the basics of a photo onto graph paper and added the block colour. I started out following it literally as a chart in a normal scale cross stitch, but it just looked terrible, far too tiny. So I started over, with bigger crosses and following the chart as a guideline. Left the pants until last, that was a bit of rookie error, didn’t have a clue how to stitch them. Ended up with half size crosses, which were a right pain but I’m pleased with the effect. It’s not easy to stitch on top of a regular cross though, as and when I start the next one I’ll try to leave a space. I’m also a little disappointed with the hands, the mitten hand leaves a lot to the imagination and the other side has a very lumpy finger – will crack it next time.

So I want to take this and make prints, although I’m not really sure how to go about that. Scanning it was not a sucess. Maybe the best way is to take a photo and retouch it in photoshop if needs be? I’d also like to do others in the same style but various colourways, I have the same fabric in blue and mint so they’d be a nice starting point. Just need to look through some more pictures of scantily clad girls. Tough life.